Basic Configurations to Do after the HotelDruid Install
When you finish hoteldruid install you'll find the main menu with all the options ready
to use, but you need to do some further configuration to be able to use its full potential. During database
creation you should already have entered the information about the rooms, but anyway you can change it
from the rooms table clicking on "modify all table fields" below the table. Remeber that by default
the rooms are named with progressive numbers, but you can change their names to match your actual names.
Besides their name the other rooms characteristics are optional, but it is recommended to add at least
the maximum capacity and the priority if you have some preferred rooms (lower priority is
assigned first).
First of all you won't be able to insert any reservation until the prices for at least one
rate are inserted. To insert the rates prices go to "insert or modify the prices" page from main menu, in
this page the first section will look like this:
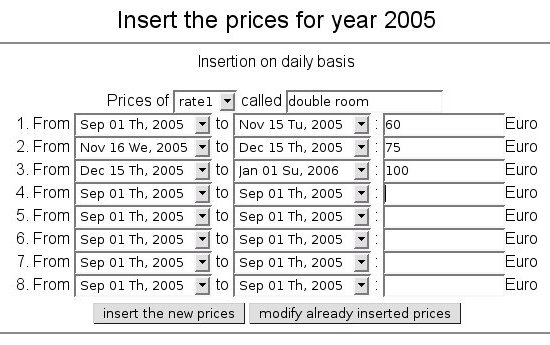
Insert the prices for each period of your rates, there are 8 periods but
if you have more you don't need to insert all of them together, so insert 8 each time. Choose the rate
you are inserting the prices for in the first line, by default there are 8 rates but you can change their
number in the "configure and customize" page from main menu. In the first line you can also change the name
of the rates, by default they are called rate1, rate2, rate3, etc. Once you insert the first rate the periods
will be remembered, so if the other rates have the same periods they will be inserted easier. If you have
different prices for week days you may use the second section to insert the prices.
If you apply some extra costs to your reservations or your clients can ask for optional services you
can add them in the third section of the prices insertion page, from where you will be guided through extra
costs options. In the fourth section you can set up the default deposit for each rate.
The next step is to associate each rate with the rooms that the reservations with that rate can
be assigned to. Go to "insert or modify the assignment rules" from main menu and in this page you will be
able to insert assignment rule 2 in the second section that should look like this:

Assign to each rate its corresponding list of rooms separated by commas without spaces. There is
no problem in assigning the same room to different rates. This way when you insert a reservation and
choose for example rate1, one of the rooms you put in the list of assignment rule 2 will be automatically
assigned to that reservation. A great advantage of hoteldruid is that if that
reservation needs to be moved between the rooms of rate1 to make place to other reservations, it will be
automatically moved. The "method for the room assignment" when inserting the reservation is only needed
if you want to override the list of rooms of the rate, for example if a client asks for a specific
room.
You are now ready to begin inserting your reservations, but if hoteldruid can be reached from other
computers on the net you should activate the login. To activate it go to "configure and customize" from main
menu, and from there to "users management". In users management page you should change the admin login from
disabled to enabled in the drop-down menu and click on "modify users" below the table, you will then be asked
for the new password.